Redis 集群
Redis 集群的安装配置
解压缩
tar -zxvf /opt/module/redis-6.2.7.tar.gz -C /opt/module编译
make -C /opt/module/redis-6.2.7安装
make install -C /opt/module/redis-6.2.7将配置文件 redis.conf 复制到 /etc/opt/redis 目录下:
cp /opt/module/redis-6.2.7/redis.conf /etc/opt//redis/redis.conf修改配置文件, 抽取公共的配置, 内容如下
# 任意主机可连接
bind 0.0.0.0

# 允许远程访问连接
protected-mode no

# 开启集群模式
cluster-enabled yes

# 设置密码为root
# requirepass root

tcp-backlog 511
timeout
tcp-keepalive 300

# 后台启动
daemonize yes

# 日志级别
loglevel notice

# 某一段slot的全部节点都宕机, 整个集群其他节点是否也变得不可用. yes表示不可用, no表示可用
cluster-require-full-coverage no

databases 16
always-show-logo no
set-proc-title yes
proc-title-template "{title} {listen-addr} {server-mode}"
stop-writes-on-bgsave-error yes
rdbcompression yes
rdbchecksum yes
rdb-del-sync-files no
replica-serve-stale-data yes
replica-read-only yes
repl-diskless-sync no
repl-diskless-sync-delay 5
repl-diskless-load disabled
repl-disable-tcp-nodelay no
replica-priority 100
acllog-max-len 128
lazyfree-lazy-eviction no
lazyfree-lazy-expire no
lazyfree-lazy-server-del no
replica-lazy-flush no
lazyfree-lazy-user-del no
lazyfree-lazy-user-flush no
oom-score-adj no
oom-score-adj-values 0 200 800
disable-thp yes
appendonly no
appendfilename "appendonly.aof"
appendfsync everysec
no-appendfsync-on-rewrite no
auto-aof-rewrite-percentage 100
auto-aof-rewrite-min-size 64mb
aof-load-truncated yes
aof-use-rdb-preamble yes
lua-time-limit 5000
slowlog-log-slower-than 10000
slowlog-max-len 128
latency-monitor-threshold 0
notify-keyspace-events ""
hash-max-ziplist-entries 512
hash-max-ziplist-value 64
list-max-ziplist-size -2
list-compress-depth 0
set-max-intset-entries 512
zset-max-ziplist-entries 128
zset-max-ziplist-value 64
hll-sparse-max-bytes 3000
stream-node-max-bytes 4096
stream-node-max-entries 100
activerehashing yes
client-output-buffer-limit normal 0 0 0
client-output-buffer-limit replica 256mb 64mb 60
client-output-buffer-limit pubsub 32mb 8mb 60
hz 10
dynamic-hz yes
aof-rewrite-incremental-fsync yes
rdb-save-incremental-fsync yes
jemalloc-bg-thread yes
另外新建两份配置文件, 一份命名为 redis6379.conf, 另一份命名为 redis6380.conf. (同时将配置文件的内容中的6379替换为6380). 其中 redis6379.conf 配置文件的内容如下
# 引入公共配置文件
include /etc/opt/redis/redis.conf

# 端口号
port 6379

# 当 Redis 以守护进程方式运行时,Redis 默认会把 pid 写入 /var/run/redis.pid 文件,可以通过 pidfile 指定
pidfile /opt/module/redis-6.2.7/xredis/pid/redis_6379.pid

# 日志文件保存位置
logfile "/opt/module/redis-6.2.7/xredis/log/redis_6379.log"

# 指定rdb转储文件名
dbfilename dump_6379.rdb

# 指定本地数据库(即rdb转储文件)存放目录, 两台redis服务器的数据存放目录必须区分, 否则会报错无法启动redis从服务器
dir /opt/module/redis-6.2.7/xredis/data/redis6379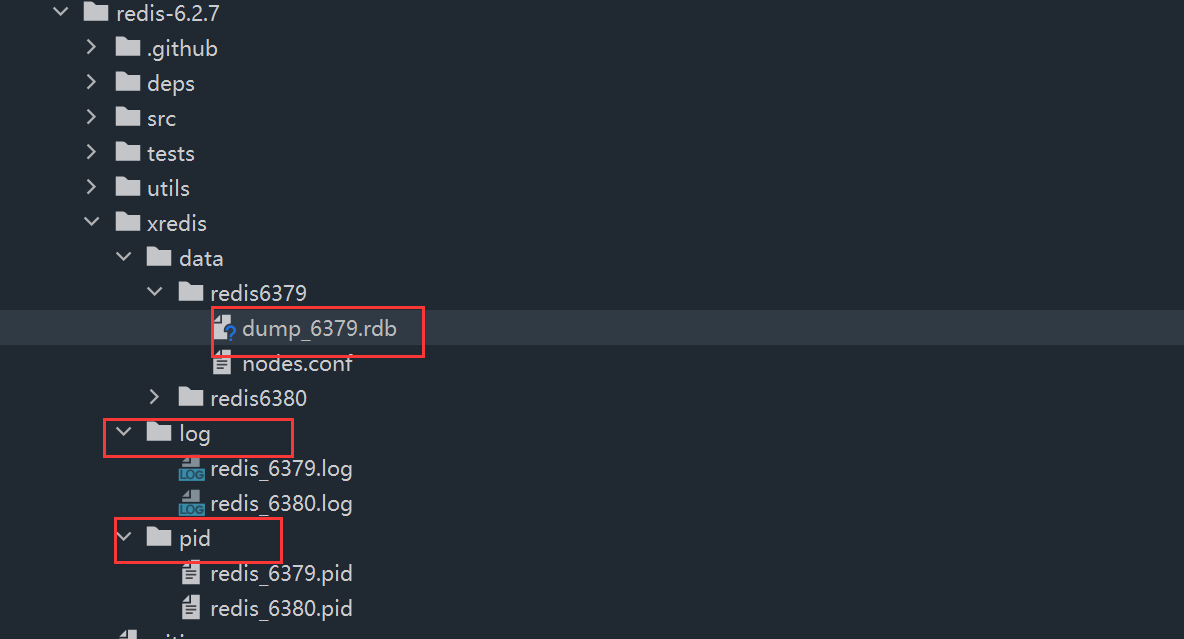
创建配置文件中自定义设置的文件夹
mkdir -p /opt/module/redis-6.2.7/xredis/pidmkdir -p /opt/module/redis-6.2.7/xredis/logmkdir -p /opt/module/redis-6.2.7/xredis/data
根据两个配置文件, 启动redis主从服务器
ls /etc/opt/redis | xarg -n1 redis-server将多个redis服务器合并成为一个redis集群
# 安装包下的src目录中的redis-cli命令
/opt/module/redis-6.2.7/src/redis-cli \
# 将启动的多个redis服务器构建称为一个集群
--cluster create \
# 一主多从, 其中n由下面的参数决定
--cluster-replicas 1 \
# 这里使用host名称映射失败过, 但是在没有配置从服务器的时候使用host名称映射也成功过
# 前面的为主服务器
192.168.248.101:6379 192.168.248.102:6379 192.168.248.103:6379 \
# 后面的为从服务器
# todo: 存在疑惑, 哪一台从服务器和哪一台主服务器相对应呢? 也有可能集群中设计成多个主服务器, 多个从服务器, 任意一个主服务器宕机都可以由从服务器顶替, 但这种设计的可能性不大, 相当于从服务器要拷贝所有主服务器中的数据保存
192.168.102:6380 192.168.248.103:6380 192.168.248.101:6380
前面三个为主节点, 后面三个为从节点
```bash
/opt/module/redis-6.2.7/src/redis-cli
–cluster create
–cluster-replicas 1
192.168.248.101:6379 192.168.248.102:6379 192.168.248.103:6379 \168.102:6380 192.168.248.103:6380 192.168.248.101:6380
连接redis集群
redis-cli -c -p 6379, 执行一条命令, 查看效果
故障恢复
根据之前的配置, 执行
cluster nodes命令可以查看集群的主服务器节点和从服务器节点
进入到
192.168.248.101:6379的redis服务器中执行shutdown命令关闭一台redis的主服务器后, 再次查看集群信息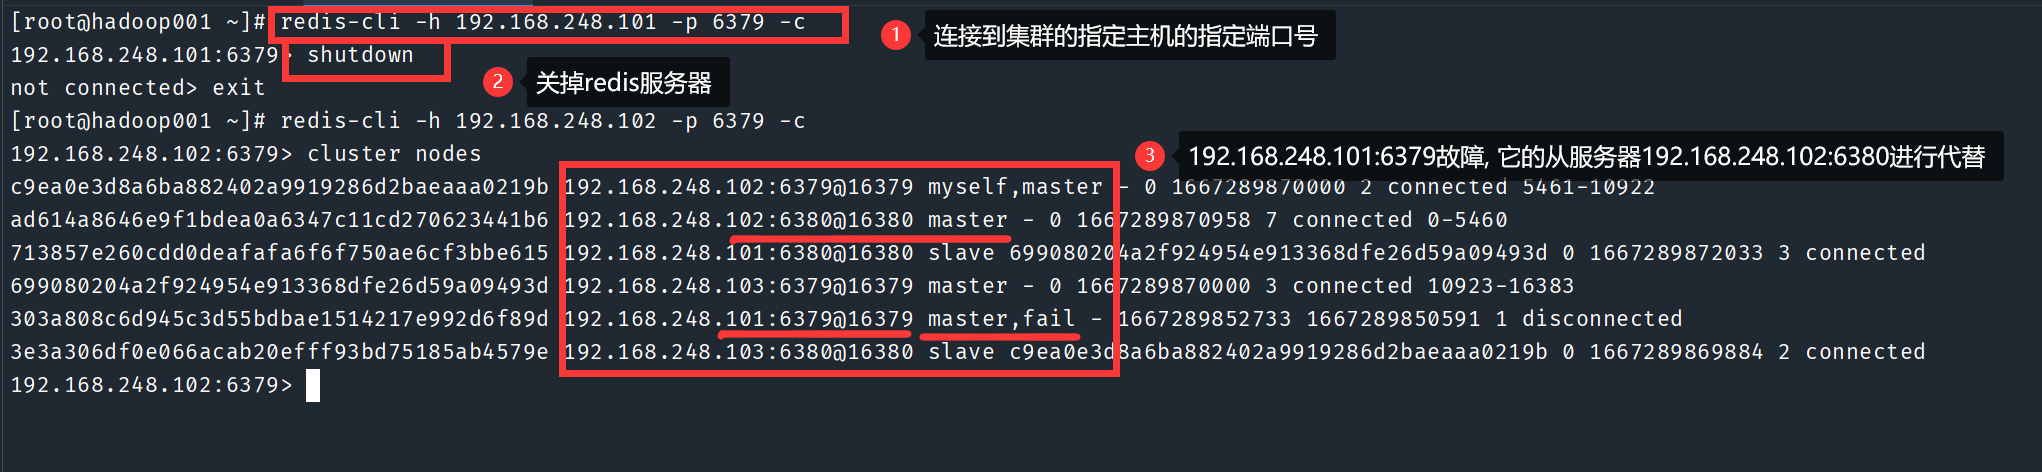
再次启动
192.168.248.101:6379的redis服务器, 查看集群信息, 故障恢复后的原主服务器不会抢占当前的主服务器
关闭整个redis集群后, 再重启redis集群, 仍然按照最初创建集群时的主服务器和从服务器的配置